


:quality(85):upscale()/2025/03/13/764/n/1922729/4c26cfa167d313d93a57b8.85428907_.webp)
:quality(85):upscale()/2025/03/12/103/n/1922153/5e6cd9bf67d234e03b5bf6.14130631_.png)
:quality(85):upscale()/2024/01/29/984/n/1922153/3153712665b828a277d2c6.55118005_.jpg)
:quality(85):upscale()/2024/11/22/933/n/24155406/398759ae6740f663d755c4.12400021_.png)


Run Windows 11 on Raspberry Pi 5 with Botspot Virtual Machine
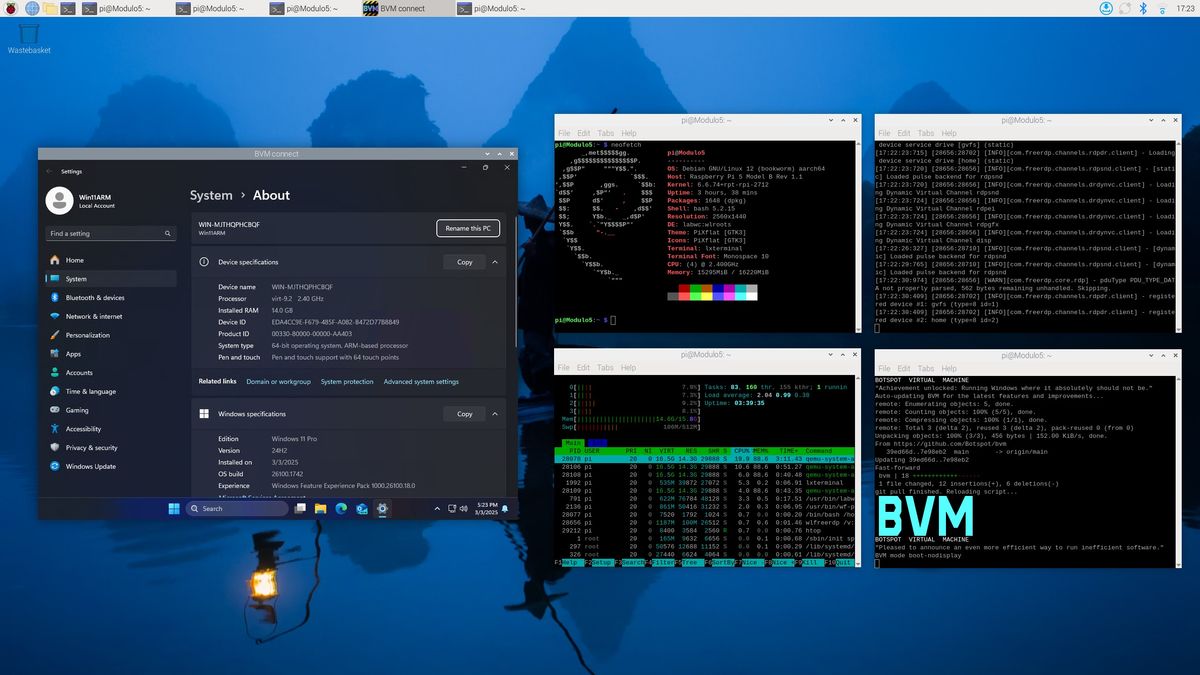
We’ve previously installed Windows on a Raspberry Pi 4 and 5 with varying levels of success. But it seems that Botspot is taking a shot at running Windows 11 on a Raspberry Pi with BVM (Botspot Virtual Machine).
BVM offers a simple installation process, most of which is automated via the terminal. There is also a GUI application available from the terminal which makes it even easier to use.
Windows 11 Arm in a virtual machine (VM) on your Raspberry Pi 5 has some caveats. Because it is KVM, there is no significant speed difference to running Windows 11 bare metal on the Pi 5. That said, it isn’t speedy, so don’t expect to be playing triple A games here. Older games (like 10-15 years ago) and web games should work ok.
Windows 11 will have access to Linux host’s Ethernet and Wi-Fi connections, and also to the host audio. Windows 11 on Arm’s Prism emulator should enable x86 and x64 apps to work, but your mileage may vary. With a little configuration, host USB devices can be seen by Windows 11 and the Windows 11 drive can be mounted in the host OS. We will cover both of these features in the steps below.
For this project I used the latest Raspberry Pi 5 16GB, and I ran the host OS, Raspberry Pi OS from a 128GB Makerdisk PCIe Gen 3 NVMe SSD using a Pineboards HatDrive! Nano. I would recommend using an NVMe SSD or USB 3 drive as it provides better performance than micro SD.
You can run this VM on a Raspberry Pi 5 with as low as 2GB of RAM, but I would recommend using a Raspberry Pi 5 4GB at the very least with the support of ZRAM.
For this how to you will need
- A Raspberry Pi 5 4GB or greater running Raspberry Pi OS
- An NVMe SSD and PCIe HAT+ board for your Raspberry Pi 5.
- You’ll need at least 50GB of freespace
- Active cooling for your Raspberry Pi
1. Open a terminal and clone the git repository.
Get Tom's Hardware's best news and in-depth reviews, straight to your inbox.
2. Run BVM for the first time. This will install all of the dependencies necessary to run the virtual machine.bvm/bvm help
3. Create a Windows 11 configuration file.bvm/bvm new-vm ~/win11
4. Download Windows 11 and all of the necessary drivers.bvm/bvm download ~/win11
5. Prepare the Windows 11 downloads for the first boot.bvm/bvm prepare ~/win11
6. Run Windows 11 in the VM for the first time. This will take some time, so grab a drink and wait it out. The VM window will open and perform an automated install. The windows will close automatically when done. Once complete, you can optionally delete all of the ISO files from /home/pi/win11/unattended.bvm/bvm firstboot ~/win11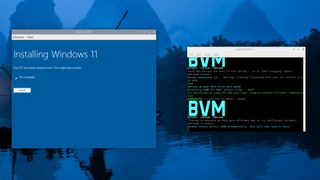
7. Boot Windows 11 in headless mode. This will give us better performance than just running the VM directly.bvm/bvm boot-nodisplay ~/win11
8. Open another terminal and connect to the headless Windows 11 session using a remote desktop. The Windows 11 desktop will appear and you can now run Windows 11 in a VM on your Raspberry Pi 5.bvm/bvm connect ~/win11
9. When you are done, shutdown Windows 11 just like a “normal” OS install.
If you’re not a fan of the terminal, then bvm has a GUI frontend which follows a simple numbered process.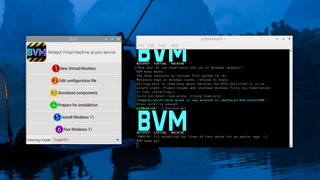
To use the GUI, open a terminal and run the following command.bvm/bvm gui
It uses the same commands behind the scenes, the GUI just makes it a little friendlier to use.
Enable USB device passthrough via bvm-config
This is a relatively new feature, so your mileage may vary. Not all devices will work as expected. But, this is a really cool feature
1. Ensure that BVM and the Windows 11 VM is shutdown.
2. Connect the USB device that you wish to use.
3. Open a terminal and list the attached USB devices.lsusb
4. Find your device ID and copy the ID. I’m using a USB DVD writer as my test device.id.jpg
5. Open the config file for editing.nano ~/win11/bvm-config
6. Look for the usb_passthrough entry and replace the ID with the ID of your device.
7. Save and close the editor by pressing CTRL+X, then Y and Enter.
8. Repeat Steps 8 and 9 in the previous section to start Windows 11 in headless mode, and then connect using RDP.
9. Your USB device is now accessible to Windows 11. In my case, the USB DVD writer was accessible as a drive.
We can also make the following changes via the bvm-config file.
- Change the username and password for the account.
- Set the language.
- Change the remote desktop connection port.
- Keep the “bloat” (debloat happens by default).
- Force the VM’s RAM allocation.
- Set the VM’s disk size (40GB by default).
- Enable / disable animations / transparency.
Just look for the relevant line in bvm-config and read the comments that explain how the configuration can be changed.
Mount Windows 11 as a drive on the host OS
We can mount the Windows 11 VM as a drive on the host OS, making it easier to bulk transfer files between the two operating systems. Note that we can only mount the Windows 11 VM while the VM is not running.
1. Open a terminal and run this command to mount the Windows 11 VM.bvm/bvm mount ~/win11
2. Open the Raspberry Pi OS file manager and navigate to /media/pi/bvmmount. Here you have full access to the Windows 11 drive and can read and write files across.
3. Unmount the drive in the file manager using the “eject” button next to its entry. You can now repeat steps 8 and 9 in the first section to start the Windows 11 VM.
4. In Windows 11, navigate to where you copied the files, they will be available for use. Obviously this doesn’t apply if you bulk copied files from Windows 11 to the host OS.
What's Your Reaction?
 Like
0
Like
0
 Dislike
0
Dislike
0
 Love
0
Love
0
 Funny
0
Funny
0
 Angry
0
Angry
0
 Sad
0
Sad
0
 Wow
0
Wow
0