


:quality(85):upscale()/2024/12/12/952/n/43463692/51ab4696675b5ad749d0b4.22667701_.jpg)


Thermalright Assassin Spirit 120 V2 Plus review: Essential cooling, with a reverse fan
Why you can trust Tom's Hardware Our expert reviewers spend hours testing and comparing products and services so you can choose the best for you. Find out more about how we test.
Everyone in the PC enthusiast community is familiar with cooling manufacturer Thermalright – or at least should be. The company has established a reputation for quality competitive coolers at comparatively low prices, repeatedly raising the bar for value in the PC cooling realm.
Most of my past Thermalright reviews have focused on the company’s best-performing products, like the excellent Thermalright Phantom Spirit 120 EVO, which sits at the top of our air cooling list of the best CPU coolers.
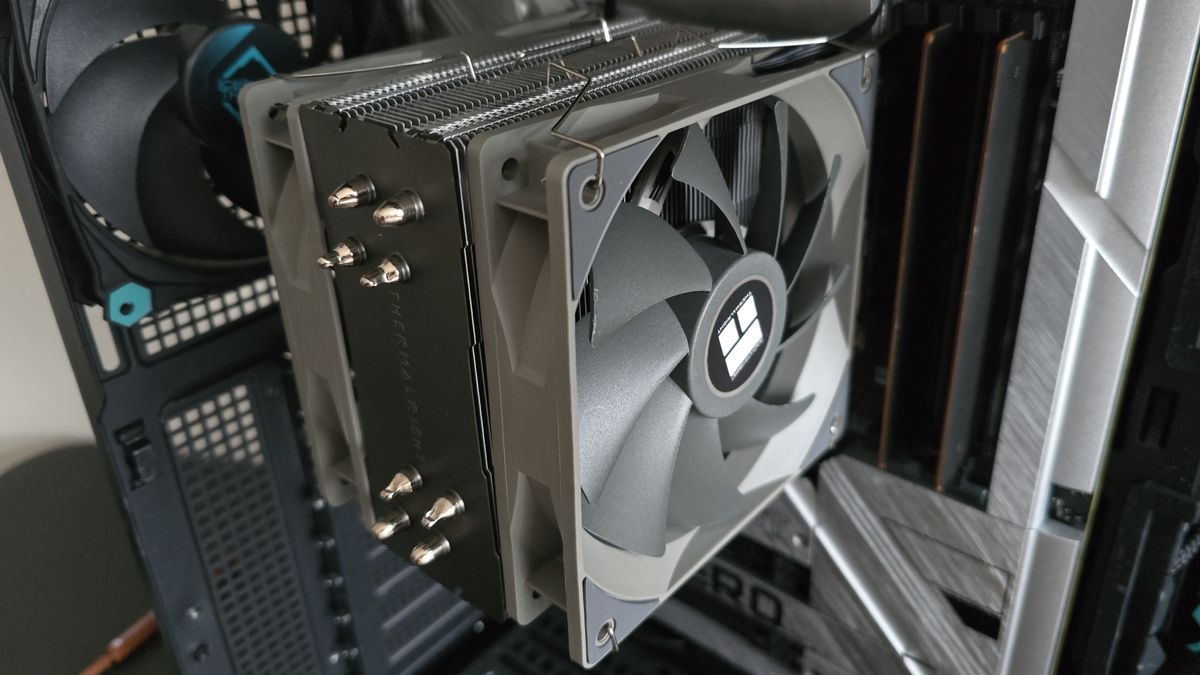
Today we’re looking at Thermalright’s Assassin Spirit 120 V2 Plus, from the other end of Thermalright’s lineup – a single tower air cooler that costs just over $20. You won’t be using this cooler to win overclocking competitions, but it provides essential performance sufficient for gaming and other common use cases. This model sets itself apart from competitors by including a 120mm rear reverse fan for cooling the heatsink, in addition to a standard 120mm fan.
Let’s take a look at the specifications and features of the cooler, then we’ll go over thermal performance so you’ll know how cool it will keep your computer’s processor and noise measurements to let you know how loudly it operates.
Cooler specifications
Swipe to scroll horizontally
Cooler | Assassin Spirit 120 PLUS V2 |
MSRP | $22.69 US |
Radiator Material | Aluminum |
Lighting | None |
Socket Compatibility | Intel Socket LGA 1851/1700/1200/115x AMD AM5 / AM4 |
Unit Dimensions | 120 (L) x 48 (W) x 154mm (D) |
Base | Direct Touch Copper Heatpipes |
Maximum TDP (Our Testing) | ~225W with Core i7-14700K ~263w with Core Ultra 9 285K |
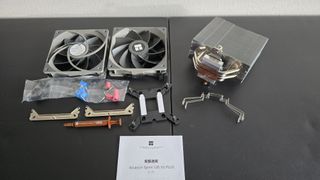
Packing and included contents
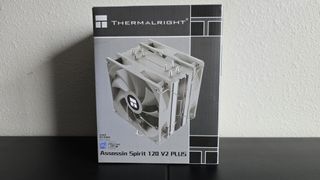
This is an entry-level cooler, so there’s not much to the packaging. The outside of the box showcases the design of the unit and a few company logos.
Included with the box are the following:
- Two 120mm fans, one in reverse configuration
- Single-tower heatsink
- Thermal paste
- Mounting accessories for modern AMD & Intel platforms
Features of Thermalright’s Assassin Spirit 120 V2 Plus air cooler
*️⃣ RAM Clearance
If you’re only using slots two and four of your motherboard, you won’t run into any compatibility issues whatsoever. However, there might be a chance for issues with the thickest RAM modules if you’re using the first slot. This is easily rectified by raising the fan up a few millimeters, which shouldn’t have a significant impact on performance.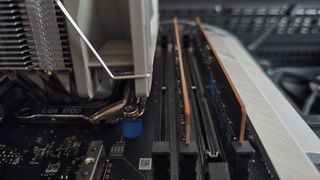
*️⃣ Thermalright TF4 Thermal Paste
Included with the AIO is a small tube of Thermalright’s TF4 thermal paste. This is the company’s entry-level thermal paste, but it performs well enough, as you can see in our best thermal paste tests.
*️⃣ Simple single tower heatsink with four direct-touch heatpipes
This cooler features a single tower heatsink to move heat away from the CPU. The design of the fins is simple; there’s nothing exotic or out of the ordinary.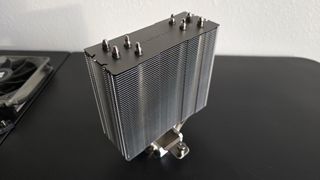
Heat is moved into the fins (shown above) via four direct-touch copper heatpipes (shown below). You don’t see many direct-touch designs on larger coolers due to engineering challenges, but on a smaller cooler like this one, it can help improve the cooler’s efficiency.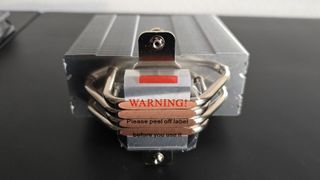
*️⃣ Basic backplate
The backplate included is basic – just enough to do the job. It is primarily made of plastic and bends easily.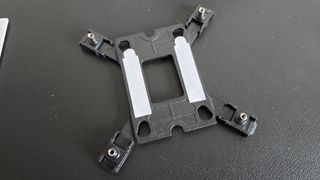
*️⃣ Two 120mm fans, including one reverse fan
There’s more to a cooler than just the heatsink or radiator. The bundled fans have a significant impact on cooling and noise levels, as well as how the cooler looks in your case. Thermalright includes two 120mm fans with this cooler, one of which is a standard design (left) and one featuring a reverse design (right) for aesthetic reasons – essentially so you don’t have to stare at the rear frame of a fan from any angle.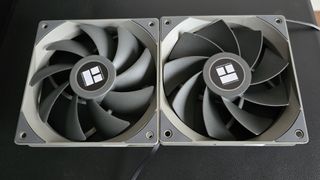
Swipe to scroll horizontally
Model | TL-C12 V2 | TL-C12R V2 |
Dimensions | 120 x 120 x 25mm | 120 x 120 x 25mm |
Fan Speed | 1500 RPM ± 10% | 1500 RPM ± 10% |
Air Flow | Up to 66.17 CFM | Up to 58 CFM |
Air Pressure | Up to 1.53 mmH2O | Up to 1.53 mmH2O |
Bearing Type | S-FDB | S-FDB |
MTTF | Unlisted | Unlisted |
Lighting | None | None |
Testing configuration – Intel LGA1700 and LGA1851 platform
Swipe to scroll horizontally
CPU | Intel Core i7-14700K |
GPU | ASRock Steel Legend Radeon 7900 GRE |
Motherboard | MSI Z790 Project Zero |
Case | MSI Pano 100L PZ Black |
System Fans | Iceberg Thermal IceGale Silent |
There are many factors other than the CPU cooler that can influence your cooling performance, including the case you use and the fans installed in it. A system's motherboard can also influence this, especially if it suffers from bending, which results in poor cooler contact with the CPU.
In order to prevent bending from impacting our cooling results, we’ve installed Thermalright’s LGA 1700 contact frame into our testing rig. If your motherboard is affected by bending, your thermal results will be worse than those shown below. Not all motherboards are affected equally by this issue. I tested Raptor Lake CPUs in two motherboards. And while one of them showed significant thermal improvements after installing Thermalright’s LGA1700 contact frame, the other motherboard showed no difference in temperatures whatsoever! Check out our review of the contact frame for more information.
I’ve also tested this cooler with Intel’s latest platform, Arrow Lake and LGA 1851.
Swipe to scroll horizontally
CPU | Intel Core Ultra 9 285K |
GPU | MSI Ventus 3X RTX 4070Ti Super |
Motherboard | MSI Z890 Carbon Wifi |
Case | MSI MPG Gungnir 300R |
System fans | Pre-installed case fans |
LGA 1700 and 1851 Installation
The installation of this cooler is simple and should be easy to complete for most users.
1. You’ll first need to place the backplate against the rear of the motherboard. Adhesive strips are included to make this step easier, if desired. I personally avoid using adhesive, but that’s mainly because I change coolers on my system fairly frequently and adhesive makes removal a little more difficult.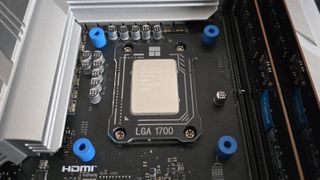
2. Next, you’ll secure the backplate by attaching the included standoffs. You’ll then place the mounting bars on top of the standoffs, and secure them with the included screws.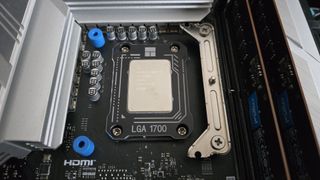
3. Apply the included thermal paste to your CPU. If you have any questions on how to do this properly, please refer to our handy guide on how to apply thermal paste.
4. Place the CPU block on top of the CPU, and secure it with a screwdriver.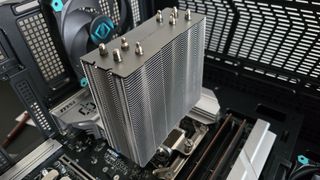
5. Attach the fans using the included metal clips. Once complete, connect the PWM cables of the fans to each other and then to your motherboard.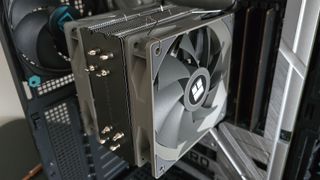
6. Afterwards, power on your computer as the installation is complete.
What's Your Reaction?
 Like
0
Like
0
 Dislike
0
Dislike
0
 Love
0
Love
0
 Funny
0
Funny
0
 Angry
0
Angry
0
 Sad
0
Sad
0
 Wow
0
Wow
0